
(Originally published on the Earthquaker Devices blog.)
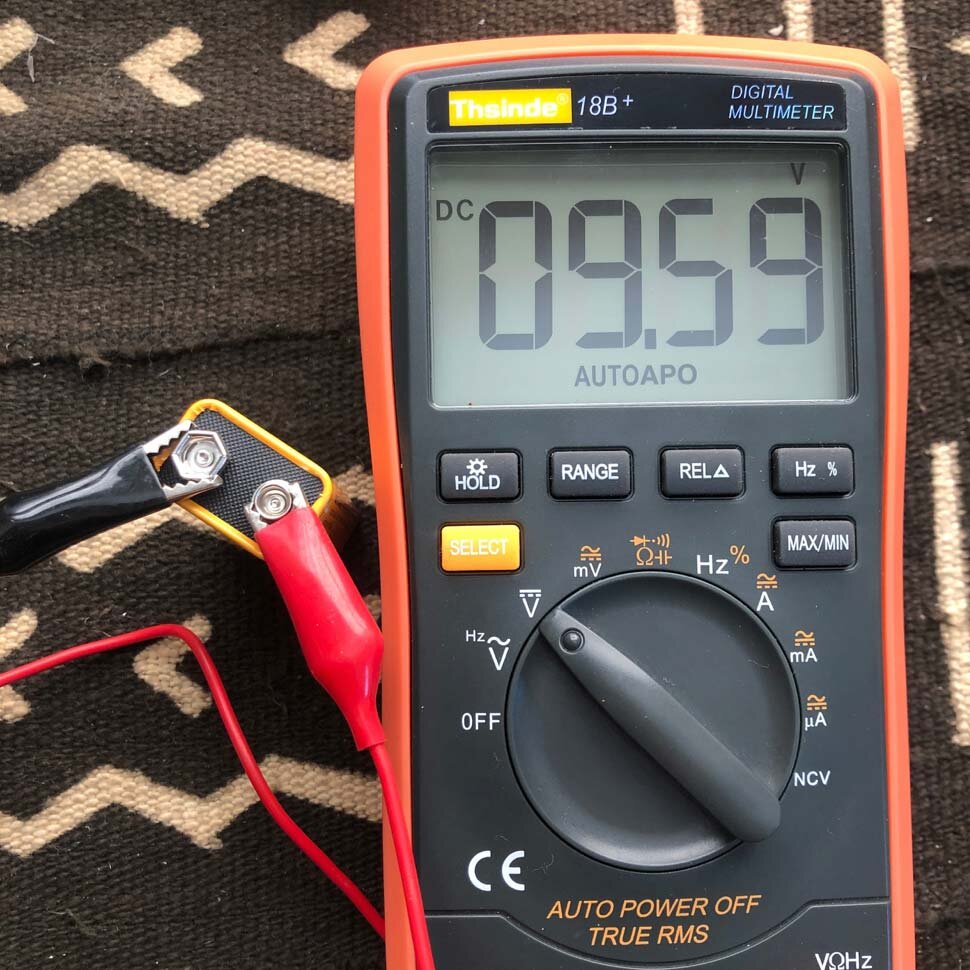
A digital multimeter is one of the most useful tools for anyone working on electronic instruments. They are used all across repair shops, on the road, and can always be reliable in dire situations. This is a must-have tool for anyone getting into electronics or at the very least curious about how their instrument works and want to know more about how to troubleshoot problems on their own. Best of all they’re not expensive either; this one that I am using on these examples costs less than $20 and you can find it on Amazon (photo 1). StewMac also offers two great options as well, one for guitar repairs and another suitable for building amplifiers.

Let’s explore some ways to use a multimeter:
- Testing a guitar cable
- Testing pickups
- Testing batteries
- Testing power supplies
- Mapping out a wiring harness
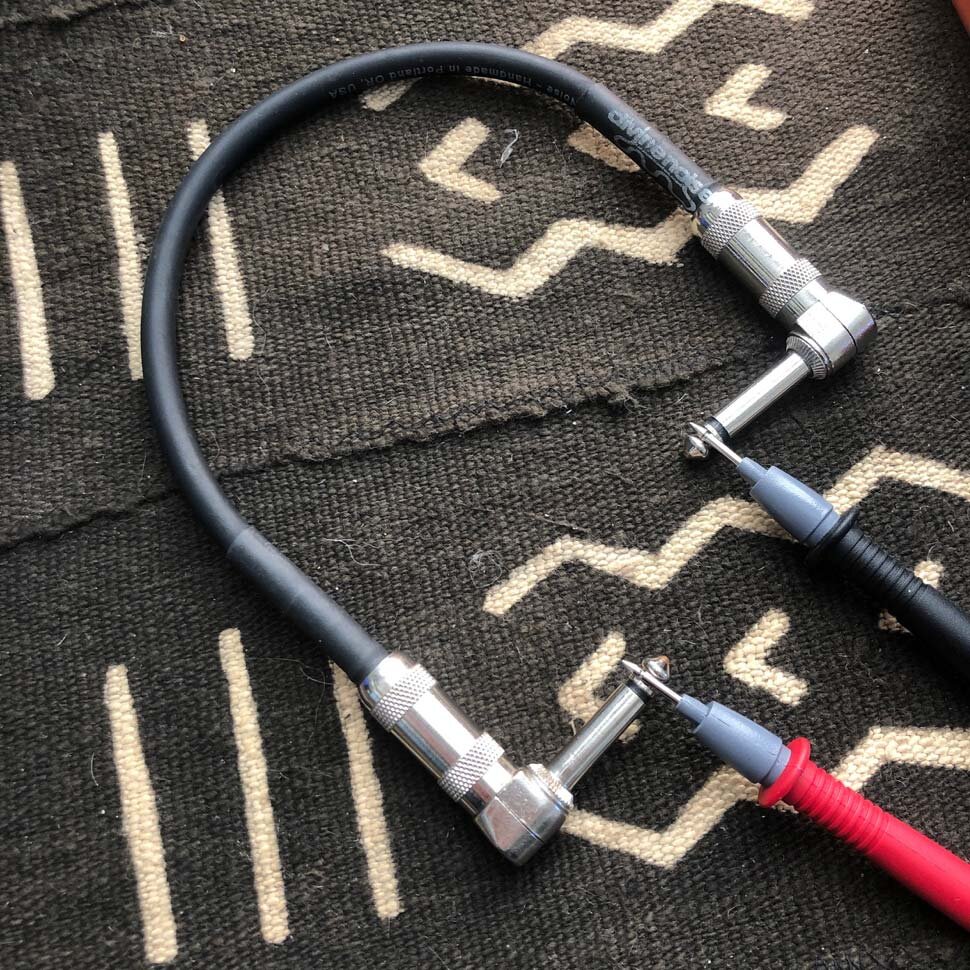
Testing a guitar cable
We’ve all been in situations where you plug your guitar in, turn on your amp, roll the volume up, and get hit with a sudden lack of sound. It can be rather humiliating if you’re not the only person in the room. It’s easy to get your mind wrapped up by asking yourself too many questions at once. Is my amp blown? Is my output jack cutting out? It’s good practice to remain cool in these situations, avoid panic and anxiety and just start with testing your cables. Oftentimes they just get unplugged without anyone noticing, but if everything is where it needs to be and there is still no signal it’s time to get your multimeter out and do some cable testing.
Set your multimeter to test continuity, then touch the tips of both cable plugs with the test leads.

Testing pickups
If you’re like me and swap out pickups regularly or buy used pickups you will save yourself a lot of trouble and money by testing them with a multimeter. Testing a pickup is a simple process. Set the multimeter to the ohm setting and touch the red test lead to the pickups primary lead (hot) and the black test lead to the pickups ground wire (photo 4). If you’re testing a humbucker with four conductor wires you must make sure the wires are properly connected to one another.
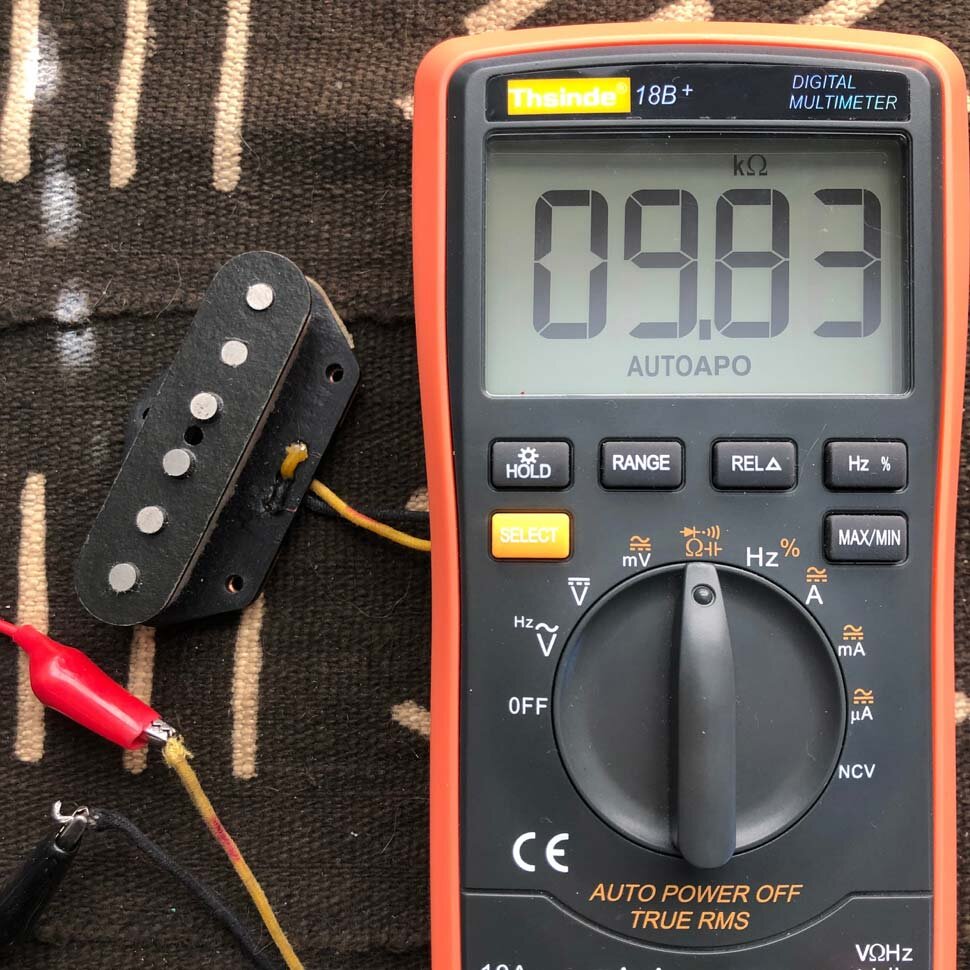
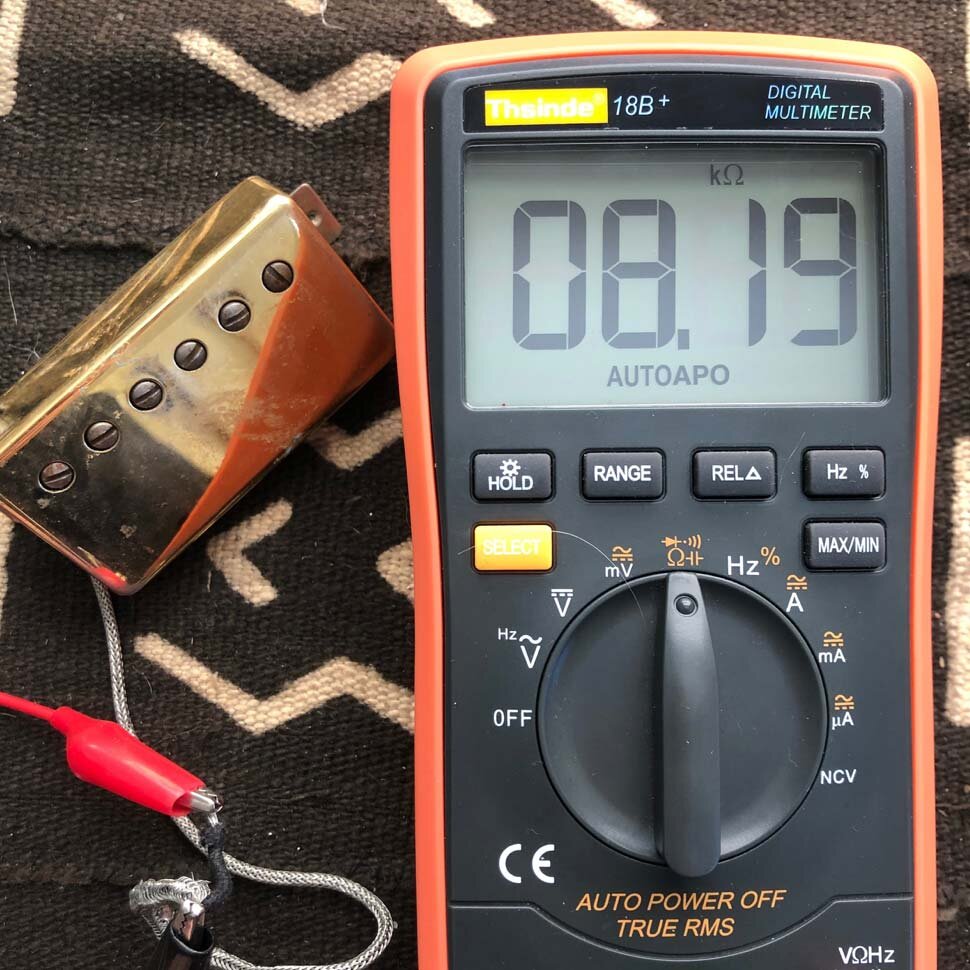
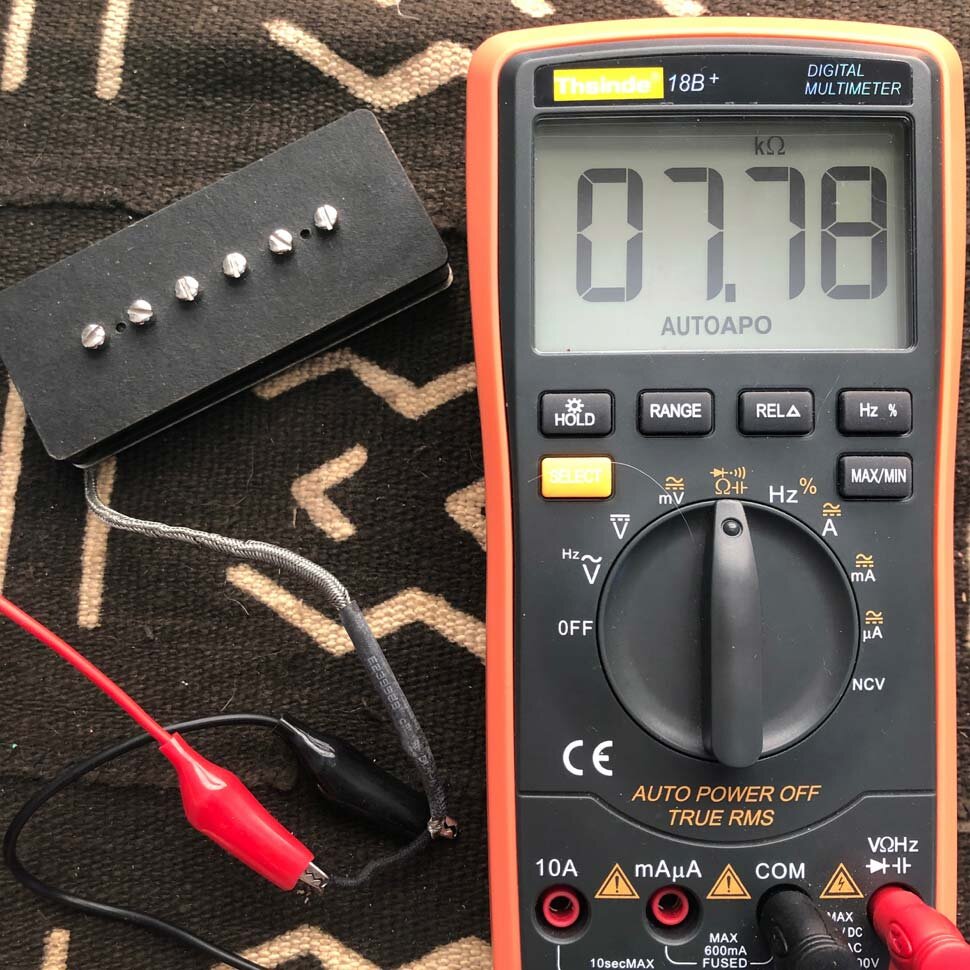
A multimeter will tell you a lot about a pickup before you wire it into a guitar. For example a typical humbucker measures around 8k of resistance for vintage style to anywhere up to 25k for high output. Single-coil pickups measure from 6k (vintage) up to 16k (high output). Some other oddball pickups found in vintage guitars can give an average reading of less than 6k but if you get a reading lower than 2k (or a reading that’s all over the place) you have a dying pickup. If you’re testing a new pickup result to manufacture for its exact resistance (find it on the box or website) make sure you have a close enough match.
Testing batteries
The days of touching your tongue to a 9-volt battery are over and might I add that it was never sanitary or accurate either to begin with. A lot of vintage pedals and even some modern boutique pedals still have the option for batteries and if you don’t use many pedals in your rig you might still rely heavily on them. You can save yourself some money (and save the environment) by testing batteries and not throwing them away when there is still enough juice to power your pedals. Nowadays, most people run several pedals if not more and in such cases a power supply is recommended for pedalboards and large signal chains.
With a multimeter you can test just about any type of battery: AA, 9-volt, lithium, or a disc battery. Set your multimeter to the DC V setting (and to the appropriate voltage range if your multimeter offers it). Touch the red test lead to the positive battery terminal and the black test lead to the negative terminal. The multimeter will display the voltage of the battery (photo 7). If you’re testing a 9-volt battery and the display reads less than 9 volts, the battery is weak. If it measures 9 volts or more, you’re all set.
Thrifty tip: If you find yourself with a low voltage battery, keep one around and plug it into something with a lot of gain (like a fuzz) to get that “dying battery” sound.
Testing power
Now, since most people are using power supplies it’s a good habit to also test them for consistency, especially when you’re dealing with pedals of different voltages. A lot of pedals run at 9 volts but that isn’t always the case. Oftentimes you will run into a pedal that typically runs on 12, 18, or even 24 volts, and if you accidentally plug a pedal into the wrong power you could potentially fry some components. A good way to avoid that is to use a multimeter to test your power.
Plug in your power supply and set your multimeter to the DC V setting again but keep in mind some pedals run on AC voltage (old Boss, Digitech, etc.) in which case you set your multimeter to AC V. Take your red test lead and insert into the terminal of the plug, then take your black test lead and touch the shaft of the plug (photo 8).
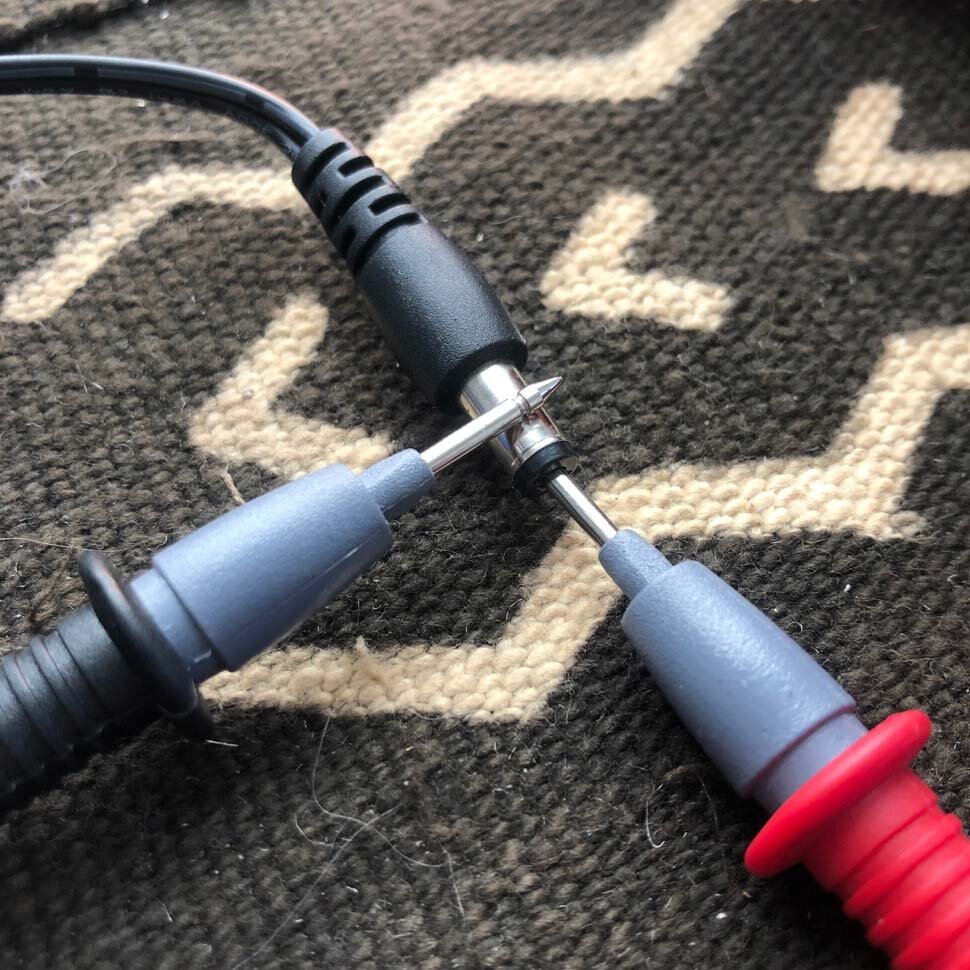

You should get a consistent reading on your multimeter for the amount of voltage coming out of the power supply (photo 9). If you get spikes or drops in your reading then something is going on with your power and it’s not safe to plug in your pedal(s).
Mapping out a wiring harness
A very common problem among players is grounding issues with their instrument. Having a multimeter and some basic understanding and curiosity about electronics could help you troubleshoot this situation. Set your multimeter to test continuity (photo 1). What you will be doing is testing resistance between two points. If there is very low resistance (less than a few Ωs), the two points are connected electrically, and a tone will be heard. If there is more than a few Ωs of resistance, then the circuit is open, and no sound will come out of the multimeter. This test helps insure that connections are made correctly between two points and also helps detect if two points are connected that should not be. For this example I will be using a Stratocaster wiring harness to demonstrate how to troubleshoot some common problems such as bad connections and grounding issues.
Set your multimeter to test continuity and start by placing one test lead on the volume pot and the other on the tone pot (photo 10).


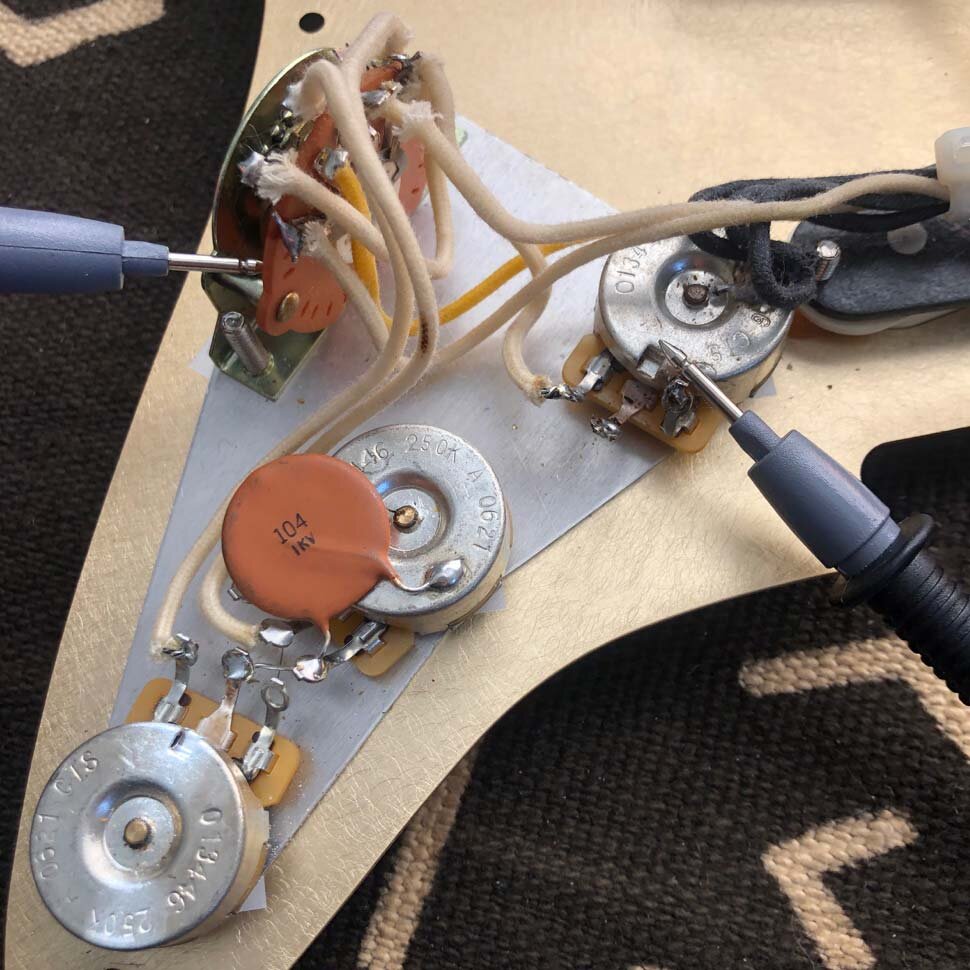
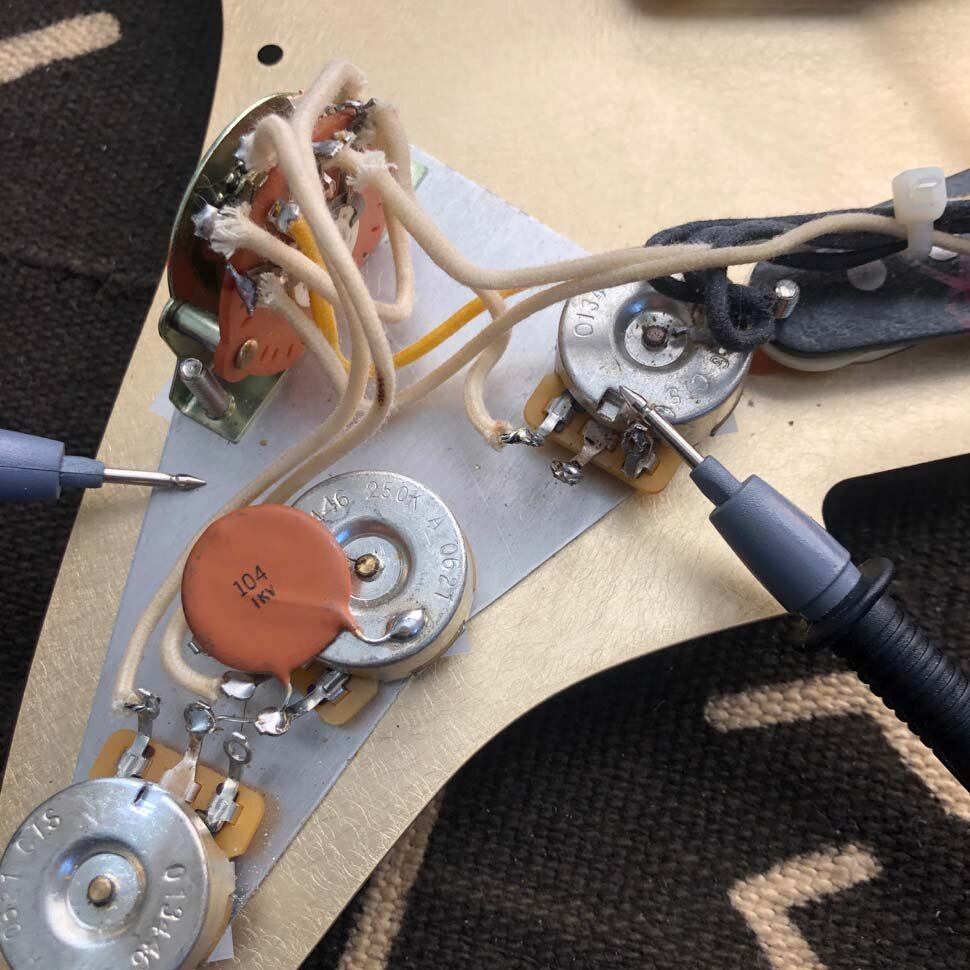
If you hear a tone emitted from the multimeter then you have a solid connection between the two. Now move your way around the different components while keeping one of the test leads on the volume pot. What you want is for the control pots, switches, pickups, output jack and in some cases the pickguard to all be grounded to one another (photos 11, 12, 13). You can easily run into noise issues if a component is not grounded in the signal. It’s also worth mentioning that you should test to see if your bridge is grounded. Most of the time your guitar strings create a ground from the bridge to the rest of the components but that’s not always the case. A Strat, for example, has a ground wire running from the Tremolo spring mounting claw to ground on the backside of one of the pots. This ensures that every piece of metal that is touching the guitar is grounded in some way. It’s a good thing to be grounded and well connected to this earth – we will never have another one like it!
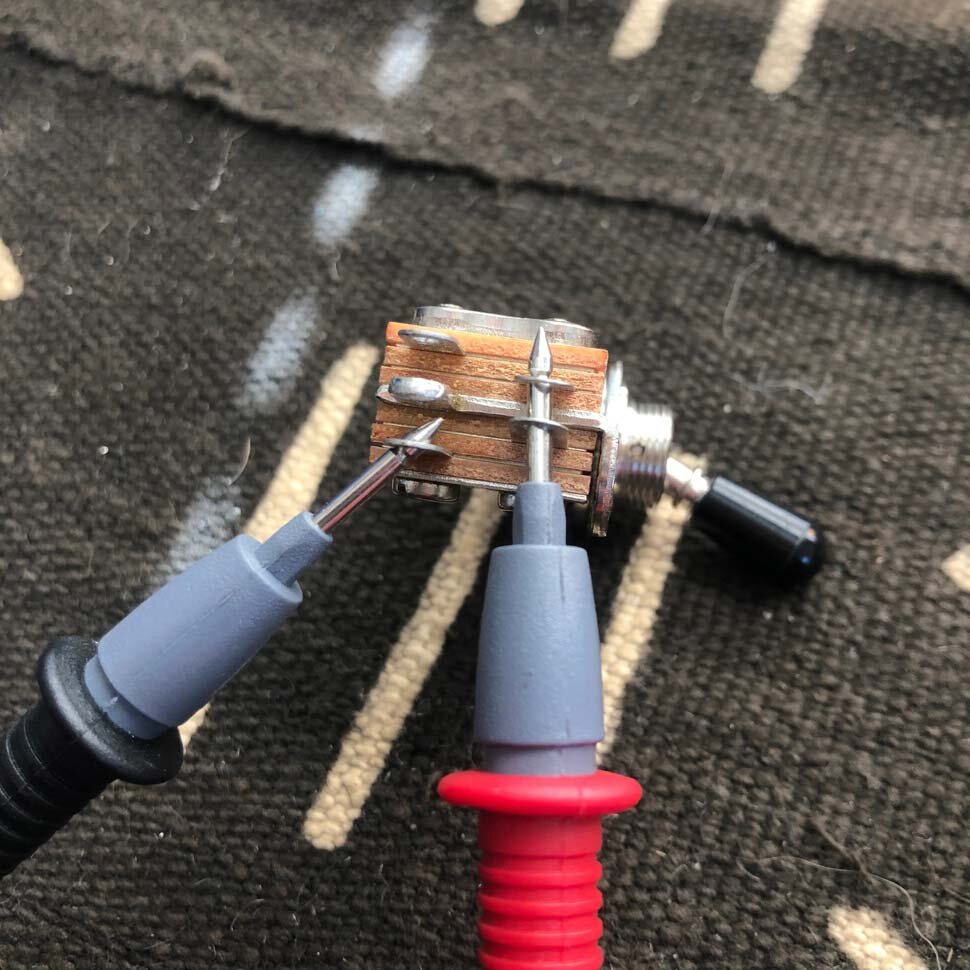
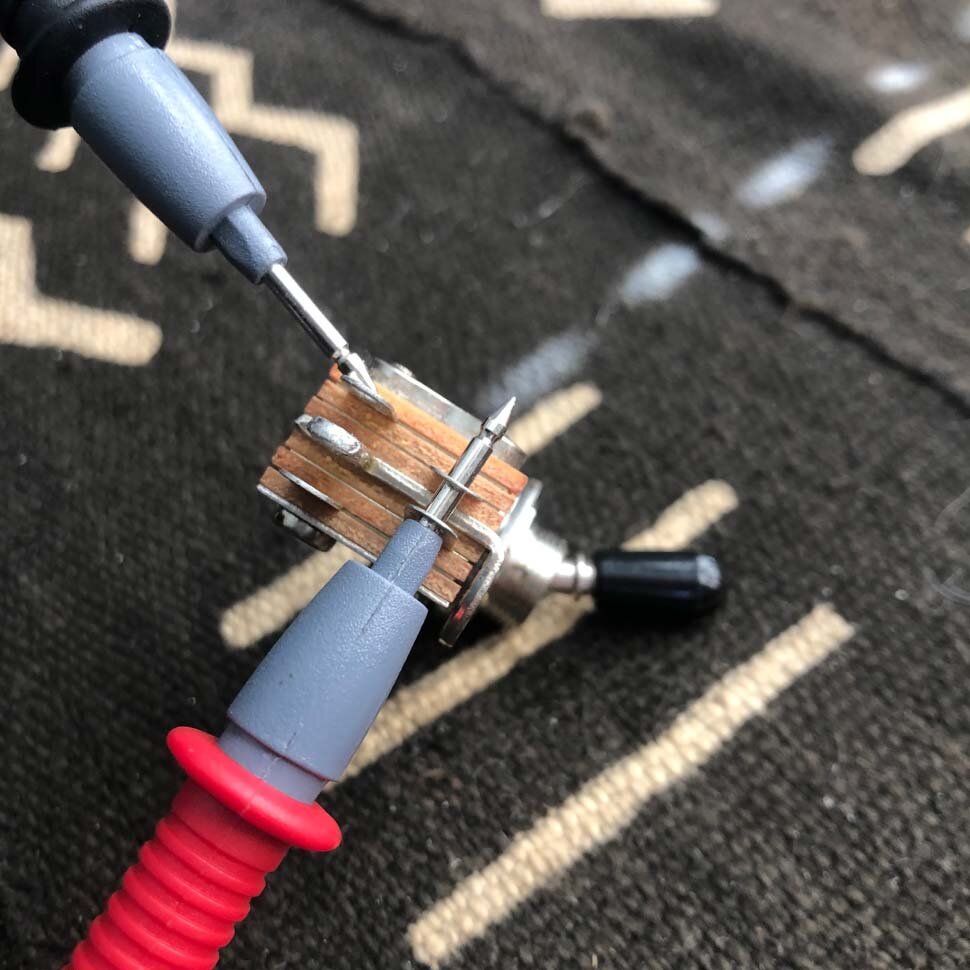
Another great way to use your multimeter is for mapping out switches when you are wiring up a new guitar or replacing an old switch. For this example I will demonstrate how to map out a 3-way toggle switch that you would typically find in a Gibson-style guitar (photos 14, 15). Start with one test lead on the output of the switch and the other on one of the outside lugs (note: the inside lug on the bottom is ground, if you touch ground then this test won’t work!). Move the toggle to either the right or left position and move the test lead to either lug until you get a tone. When you hear the tone then that means you have a signal going to that position. This will help ensure you don’t accidently wire a guitar backwards and have your neck pickup wired in the bridge position on the switch.
There is plenty more that you can do with a multimeter and they can come in handy even more when you start opening up pedals or amplifiers and want to understand how they are wired up and where the signal is going. I think every guitar or bass player should have one of these in their setup kits as you can really benefit from troubleshooting your own instruments before taking them into a repair shop. You may just be able to find and solve the problem on your own and have a rush of excitement, relief, and feelings of accomplishment, and that’s what this is all about.
